We currently have a projects page where you can browse projects that have been built using ev3dev. You can add your own too! Each project gets a dedicated page for the author to explain what they have been working on, as well as provide videos, pictures, build instructions, code, and any other media that pertains to the project. This is where we explain how you can submit your project page to be hosted on the site.
Overview
All the projects on the website are stored in the projects folder. Each post is saved as a Markdown file, and is automagically converted to HTML when you publish your changes (read more about Kramdown here). To submit a page, all you need to do is add a markdown file in that folder and submit a pull request. We recommend that you start with a copy of the template project. You can see the example file live on the website.
This guide will walk you through submitting a page without the need for any git experience or local tools installed on your computer. All you need is a browser.
Step 1: Making a Copy of the Website Source
The first step to submitting your project is forking the source code on GitHub. To do this, open a browser and navigate to the website repository. Make sure that you are signed in to your GitHub account, and then click the “fork” button in the upper-right corner.

It should take a second, but when GitHub finishes processing your request you should be at a page very similar to where you started, except now you are looking at your own copy.
Step 2: Setting Up A Preview (Optional)
If you want to be able to preview your new page before you submit it, and you are
willing to add a bit of extra complexity, you can do so by using the ./publish.rb
script. This involves cloning the ev3dev.github.io repository on your local
computer and installing ruby. See the ev3dev.github.io README for more info.
Step 3: Adding Your Page
Now that you have your own copy the site, it’s time to create your page. To
start, use the file list and choose the projects/_posts folder. Select the
file called 2014-03-21-Example-Project.md to open it in the browser.
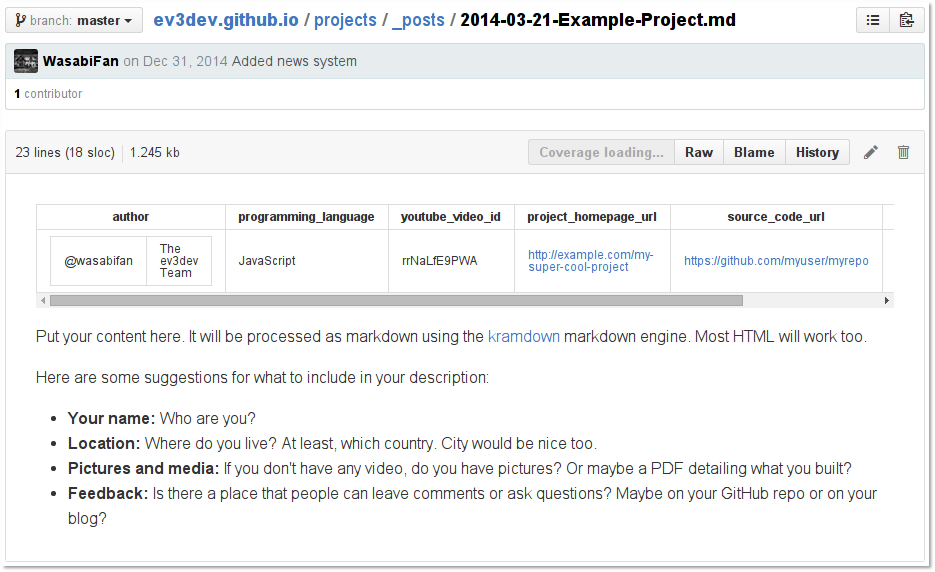
GitHub will try to read the file and render it how it thinks it’s intended to be displayed. Although the preview that it shows you probably won’t look exactly like it will on the site, it should give you a pretty good idea.
Click the “Raw” button in the upper-right corner of the page to view the contents of the file itself.
This file that you have opened is not an actual project. It is a template file that is meant to be copied to make new project creation easier. The part we want is everything between the “—”s. This is called “frontmatter,” and it describes everything about a project, such as the author of the project. Select and copy the frontmatter out of the template file (make sure that you include the dashes). This is what you should have.
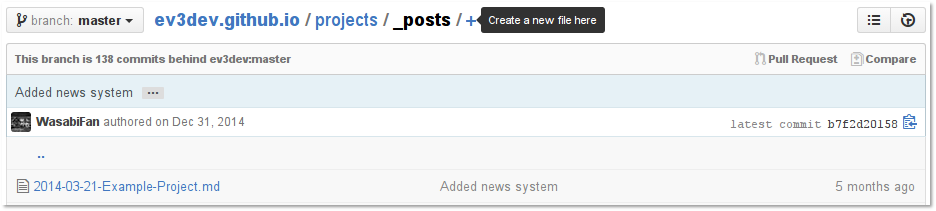
Now use the “back” button of your browser to go back to the posts folder. Click the “+” button to create a new file.
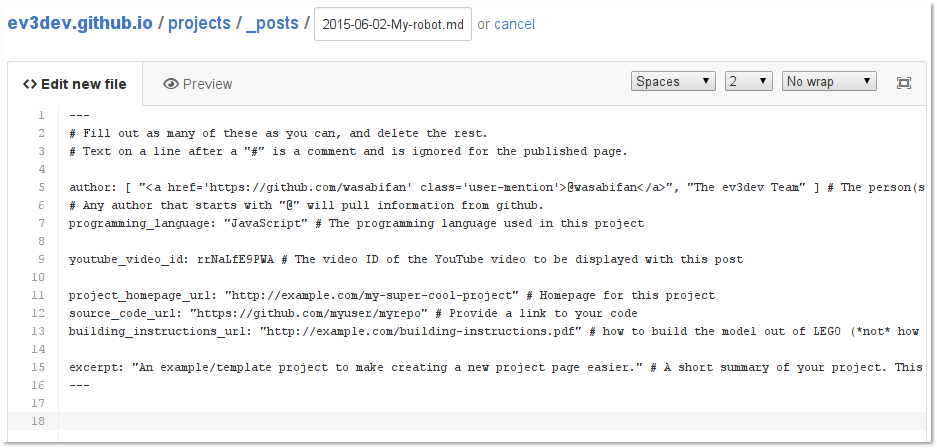
Give it a name using the format “YYYY-MM-DD-my-project-name.md”, where
YYYY, MM, and DD are the current year, month, and day, and
my-project-name is the name of your project, with dashes instead of spaces.
Then paste in the frontmatter that we copied earlier. Fill out as many of the
properties as you can, and delete the lines of the ones you can’t fill out.
After the second set of dashes (‘—’), you can type your description text,
which is parsed as Kramdown on the site.
Once you are happy with the content of your new page, click the “Commit new
file” button to save your changes. This is when you should go and preview your
page if you created a gh-pages branch earlier.
Step 4: Submitting Your Changes
Now that you have made your changes to your copy of the site, you need to submit your changes for review.
Open a browser and navigate back to
https://github.com/<username>/ev3dev.github.io.
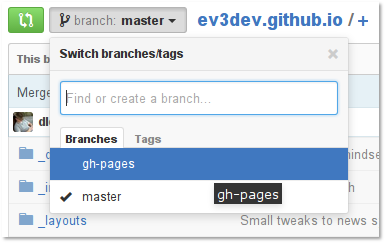
If you followed step 3, you will need to switch to the gh-pages branch that
you created earlier using the same box in the upper-left corner. Click it and
select “gh-pages.”
Now click the green “Compare, review and pull request” button.

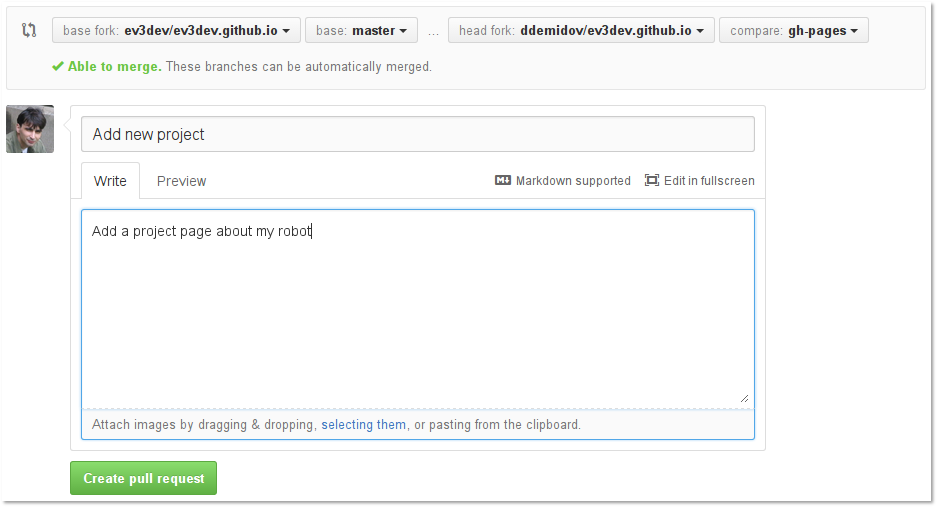
Then click “Create pull request,” and enter a title and brief description of your new page before clicking the button that says “Create pull request” again to submit your changes.
The project maintainers will be notified automatically that you have submitted edits, and will review and merge your changes when they get the chance.
